Transcript
Let’s take a look at how you can invite team members or clients to your Vista Social account so you can start taking collaboration and workflows to the next level.
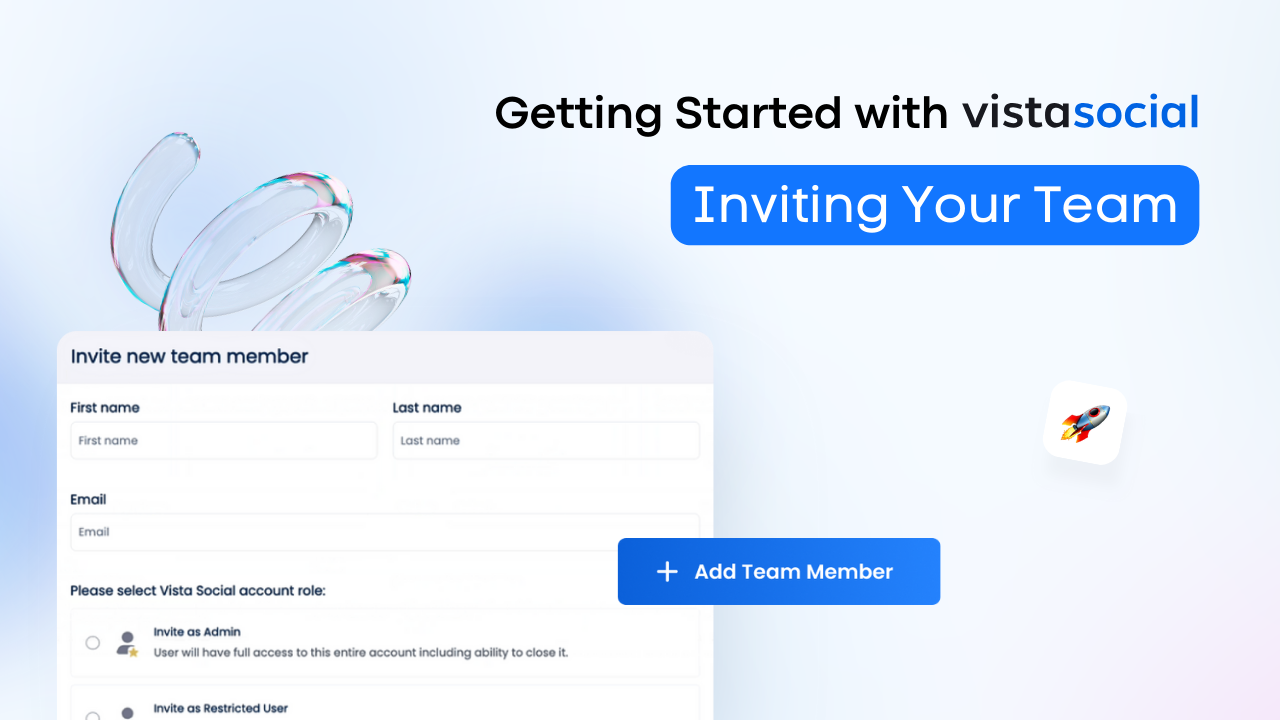
To start things off, head over to the bottom left corner of your dashboard where you’ll see a plus icon. From here, you’ll see the option to add a new team member. Here’s where the magic happens. You’ll want to add their name and their email address. But keep in mind that if the person you’re trying to invite already has a separate Vista Social account, you won’t be able to add them under your subscription.
If that’s the case, you can get in touch with our awesome support team and they’ll be more than happy to help. Now that that’s settled, you have two options when adding team members. You can either add them as an admin, or a restricted user to the profile groups that they’ll be a member of. It all depends on the type of access you want to give them.
You’ll first see three options where you can choose them to be either. An admin of the selected profile group, where they’ll have access to everything within that profile group. A read only user, where they can view everything, but won’t be able to make any changes. And finally, a restricted user, where you get to pick what the person can and cannot access within that profile group, with options such as manage, view only, or directly no access to that feature.
If you select this option, you’ll see a drop down of all the features available where you can manage the user’s permissions. Once you’ve got the permissions, you can then send out the invite The team member or client will then receive an email where they can accept the invite, create their account, and they’re all set.
Now that you’ve got them connected, your social profiles connected, you’re ready to take your social presence to the next level. Want to learn more about scheduling posts and working your way around publishing? Check out this next video to see how easy it is with Vista Social.