So, you want to have clients and collaborators review and approve posts. But teaching them another tool, giving them another set of usernames and passwords is just not cutting it. Well, with the social shared calendar, you can actually skip all the tech setup and get your posts in front of them super quickly.
Setting Up Profile Filters and Sharing
You’ll want to make sure to start by setting up your profile filters first. I’ve got a lot of clients, a lot of brands that I manage, but I want to ensure that I only have up the one that I want to share the calendar with.
And so I’ll head over to this share icon on the top right, click on share, and we’ll click right there at the bottom. I can give this a name. Now, keep in mind that the social logo won’t show up on this shared calendar link, so this is a great opportunity to add some branding, whether it’s your agency or whether it’s the client’s brand.
I’ll go ahead and just add Matthew’s Coffee there. After you set up a title, there is a ton of settings that you can change down below. Time zone is one of them, of course.
Configuring Post Status and Filter Settings
Now, lets talk about post statuses. In this case, I just want this client or the stakeholder to see posts that are awaiting review, meaning anything that’s already been published. I don’t want to clutter their inbox or clutter their calendar, so I just want to show them things that are in review.
Now any post authors are showing up here, but you can specify maybe only want posts from a specific team member. You can also set up so that only certain post labels end up showing up on this calendar, and even content types and queue labels.
This is where it’s important if you want them to be able to approve. You want to make sure that you turn on this switch. Then you’ll want to set up a start date. So this is the date of the first post that should be showing up on this calendar. In my case, let’s start with May 1st.
Now, optionally, you’ll be able to choose a date to, meaning if you want this to have a cutoff or posts past a certain date won’t show up, you can defiantly do that. And then obviously an expiration date, if you want this link to stop working after a certain period of time.
By default, they don’t have password, meaning anybody who has access to this link that you share it with will be able to go in and then approve or reject the post. We definitely recommend adding a password. I’ll just temporarily create one, one, two, three, four, five, and I’ll save that there.
What the Client Experience Looks Like
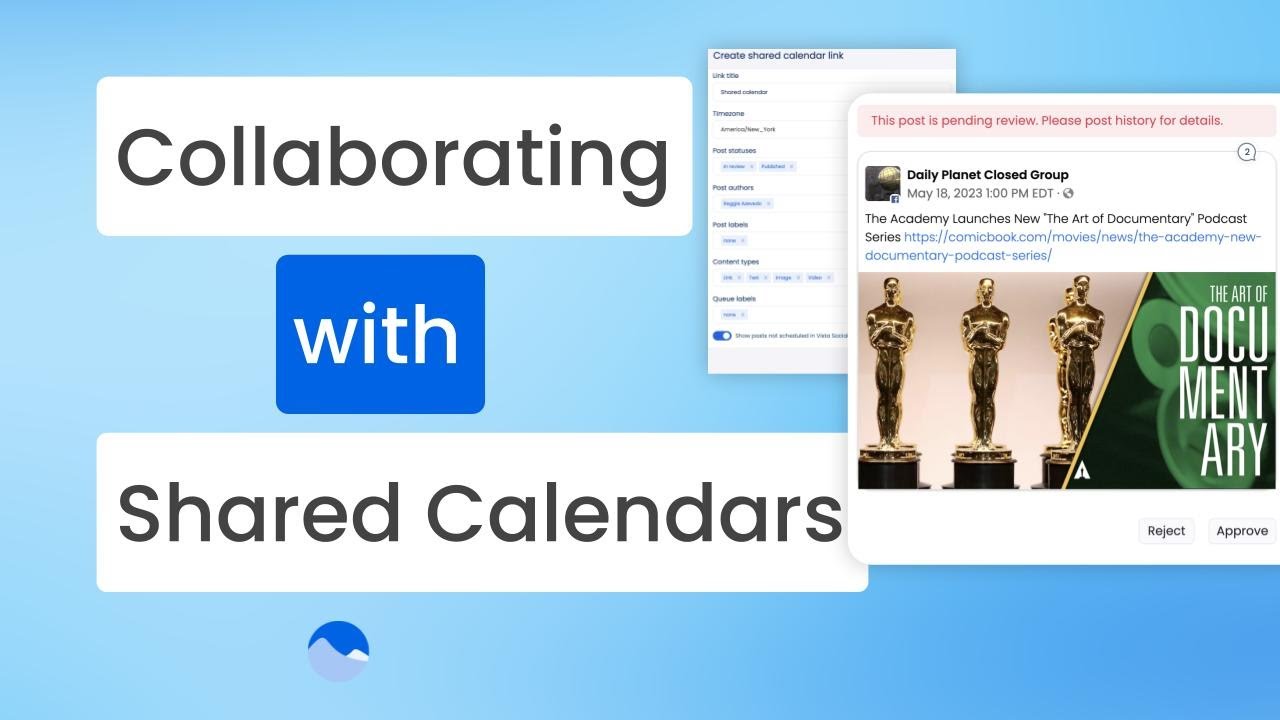
So what will this look like for you client or you collaborator? So once you get this link over to them, and you give them access via the password, you’ll be able to see all of the posts that match the filters that you set up. So in my case, posts from May 1st to June 4th, all the profiles that I selected, and the posts in the in review status.
Now in this case, I’m shown a list view. They can also head over to a calendar view for these posts as well. Here’s a post going out May 7th. I’ve got the Facebook version, the Twitter version that I can scroll through as well. Now, this is helpful if I’ve set up different captions for the different networks.
And from right here, they can go ahead and approve this post, and even reject the post. And when they reject it, they can go ahead and add in a note. Let’s swap that image.
Managing Approvals and Feedback
Now, if this is their first time using this link, we’ll ask them to introduce themselves, and that way that rejection note or that approval will have a specific client or a specific name attached it. So in this case, I’ll just go ahead and call this Matthew, and this is the client. And I’ll click save.
Now, once your client has saved this, you can see all of the rejections right here in the rejected posts. You can even click through to see a posts history. And that way, any comments that come in will also show up here in the history.
But that’s pretty much it. If you have any questions or thoughts as you’re getting your shared calendar setup, make sure to reach out to our support team so we can help you out.